Have you ever heard of a 3D resin floor? If not, you’re in for a treat!
We will explore what exactly a 3D resin floor is, why you should consider choosing one, and the advantages and disadvantages of this innovative flooring option. We will also discuss the materials needed for laying a 3D resin floor and provide a step-by-step guide on how to prepare the surface and lay the floor.
If you’re curious about this unique flooring solution, keep reading to learn more!

What Is A 3D Resin Floor?
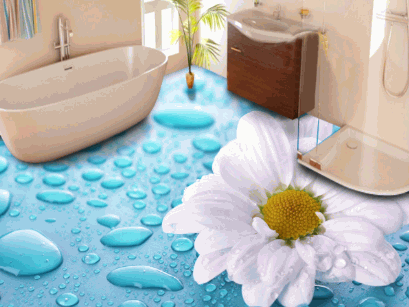
A 3D resin floor is a cutting-edge flooring solution that uses epoxy resin to create stunning, lifelike designs that appear three-dimensional, providing a seamless finish and a unique aesthetic appeal.
Regarding the materials involved in crafting a 3D resin floor, epoxy resin is the star player. This versatile material is known for its durability, resistance to stains, and ability to encapsulate intricate designs. During the installation process, the epoxy resin is poured onto the existing floor surface and then carefully manipulated to achieve the desired 3D effect.
One of the most exciting aspects of 3D resin floors is the wide range of designs that can be achieved. From abstract patterns to realistic images like ocean waves or forest scenes, the creative possibilities are endless. This flexibility allows homeowners and businesses to personalize their spaces with truly unique flooring.
The key feature that sets 3D resin floors apart is their seamless finish. Unlike traditional flooring options with visible seams, a 3D resin floor creates a smooth, uninterrupted surface that enhances the overall aesthetic of a room. Whether opting for a glossy or matte finish, the seamless quality adds a touch of sophistication to any space.
Explore in-depth: What Is Epoxy Flooring
Why Choose A 3D Resin Floor?
Choosing a 3D resin floor offers numerous advantages, including exceptional durability, high strength, and an impressive appearance that can transform any space.
What Are The Advantages Of A 3D Resin Floor?
One of the main advantages of a 3D resin floor is its durability and high strength, making it suitable for both residential and commercial spaces.
These floors are known for their long-lasting nature, as they can withstand heavy foot traffic and maintain their aesthetic appeal for years.
The strong resistance to wear and tear makes them ideal for busy areas such as hallways, kitchens, and public venues.
In addition, the ease of cleaning and maintenance of 3D resin floors is a major benefit for busy homeowners and businesses, saving time and effort.
Furthermore, the safety features of these floors, including fire resistance and hygienic properties, provide peace of mind for occupants.

What Are The Disadvantages Of A 3D Resin Floor?
While 3D resin floors offer many benefits, there are some disadvantages to consider, such as the high cost and the time-consuming installation process, which requires meticulous surface preparation and curing times.
One of the potential drawbacks of opting for 3D resin floors is the high initial cost involved. The materials required for such flooring can be expensive, and the installation process often demands professional expertise, further adding to the overall expenses. The intricate nature of 3D resin floors necessitates careful surface preparation to ensure proper adhesion, which might entail additional costs for repairs if not done correctly.

What Are The Materials Needed For Laying A 3D Resin Floor?
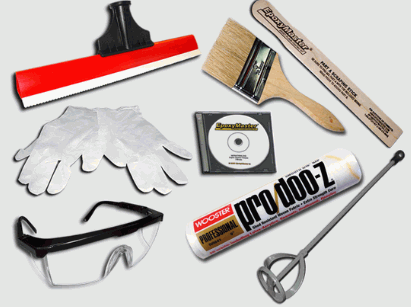
To lay a 3D resin floor, you will need a range of materials and tools, including epoxy resin, hardener, pigments for coloring, a primer for surface preparation, and various tools such as a squeegee, roller, and trowel.
Resin
The primary component for creating a 3D resin floor is epoxy resin, which is mixed with other resin components to form a durable and visually appealing surface.
One of the key properties of epoxy resin is its ability to create a high-gloss finish that enhances the depth and vibrancy of the 3D design. Epoxy resin is highly durable, making it ideal for high-traffic areas or spaces that require a long-lasting flooring solution. Its self-leveling nature ensures a smooth and seamless surface, eliminating the need for extensive polishing or finishing work.
Hardener
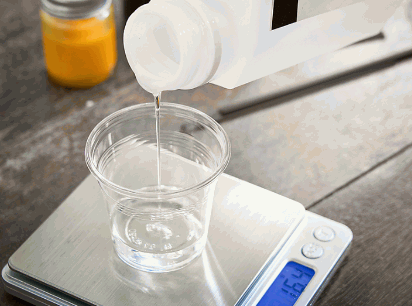
Hardener is a crucial component in the resin mixture, as it helps to solidify the epoxy resin and create a strong, durable finish.
When the hardener is added to the epoxy resin, a chemical reaction occurs that initiates the curing process. This reaction transforms the liquid resin mixture into a solid, durable surface, capable of withstanding various environmental conditions. It is essential to properly measure and mix the hardener with the resin to ensure a complete and uniform cure. Improper ratios or inadequate mixing can lead to weak spots or an incomplete cure, compromising the overall effectiveness of the resin coating. Therefore, precise attention to detail during the mixing process is critical for achieving optimal results.
Pigments
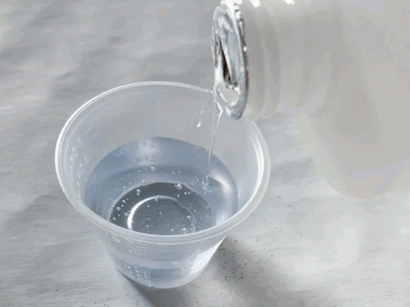
Pigments are used to add color to the epoxy resin, allowing for a wide range of design possibilities for 3D resin floors.
There are various types of pigments that can be used in resin floors, including liquid, powder, and paste forms. These pigments are carefully mixed into the resin to achieve the desired color and intensity. Achieving the perfect hue involves a meticulous process of measuring and blending the pigments to ensure uniform distribution throughout the resin mixture.
By combining different pigments, a vast spectrum of colors and intricate designs can be created, ranging from vibrant swirls to subtle gradients. Consistent and thorough blending is key to maintaining a uniform appearance across the entire surface of the resin floor, ensuring a visually appealing finish.

Primer
Applying a primer is an essential step in surface preparation, as it enhances adhesion between the epoxy resin and the underlying surface.
Primers create a strong bond between the surface and the paint, helping to prevent chipping or peeling. They also promote a smoother finish by filling in imperfections and sealing porous surfaces.
There are different types of primers designed for specific surfaces, such as metal, wood, drywall, or masonry. For example, a metal primer will contain rust inhibitors, while a wood primer may have sealing properties to prevent tannin bleed.
Choosing the right primer for the surface you are working with is crucial for achieving long-lasting paint adhesion and a professional-looking result.
Tools (Squeegee, Roller, Trowel)
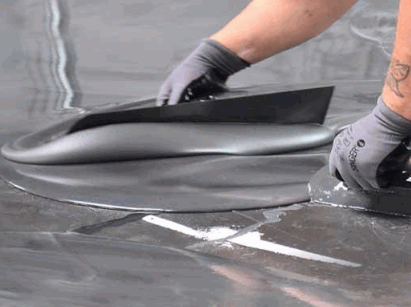
A variety of tools, including a squeegee, roller, and trowel, are needed to apply the resin mixture and achieve a smooth, even finish.
Each tool plays a crucial role in the application process. The squeegee is great for spreading the resin mixture evenly across the surface, ensuring no air bubbles are trapped underneath. The roller helps to further smooth out the surface, providing a polished look. The trowel is handy for precise detailing and smoothing out any rough spots.
Remember, using the right tools is essential to avoid inconsistencies and imperfections in the final result. Always clean and maintain your tools properly to prolong their lifespan and ensure they function effectively every time you embark on a resin project.
How To Prepare The Surface For Laying A 3D Resin Floor?
Proper surface preparation is crucial for laying a 3D resin floor, as it ensures optimal adhesion and a flawless finish.
Cleaning
The first step in surface preparation is cleaning the surface to remove any dirt, debris, or grease that could interfere with adhesion.
It is crucial to select the appropriate cleaning agents based on the type of surface being worked on. For example, mild soap and water can be effective for cleaning painted walls, while tougher stains might require stronger solvents or degreasers.
After applying the cleaning agent, ensure thorough rinsing to eliminate any residue that could affect the bonding of subsequent layers. Additionally, contaminants like dust or oils must be completely removed to prevent issues in the finishing process.
Repairing Any Damages
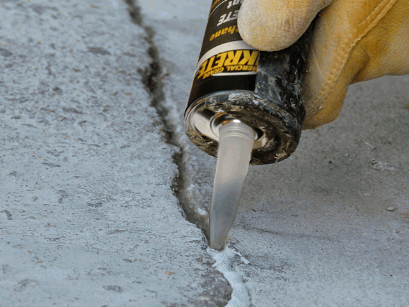
Any cracks or holes in the surface must be repaired to create a smooth and even base for the epoxy resin.
To effectively repair surface damage, it is essential to first assess the extent of cracks and holes. Common materials used for filling in these imperfections include spackling paste, joint compound, or epoxy filler. Spackling paste is ideal for smaller cracks and holes, while joint compound works well for larger imperfections. For a more durable and long-lasting repair, epoxy filler is often recommended.
After selecting the appropriate filler, carefully apply it to the damaged areas using a putty knife, ensuring a smooth and level surface. Sanding the filled areas once the filler has dried will further guarantee a seamless finish that is ready for the application of epoxy resin.
Leveling The Surface
Leveling the surface is a critical step to ensure that the epoxy resin spreads evenly and creates a smooth, even finish.
When the surface is not properly leveled, it can result in an uneven application of the resin, leading to bubbles, bumps, and imperfections once the 3D resin floor is fully cured. This can not only affect the aesthetic appeal of the floor but also compromise its durability over time.
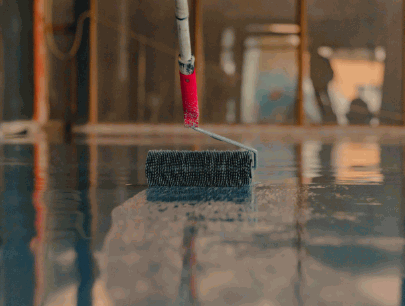
Using self-leveling equipment such as a spiked roller to distribute the resin evenly is essential to achieve a flawless final appearance. A level surface acts as a solid foundation for the resin, enhancing its adhesion and overall longevity. Remember, the success of your resin flooring project heavily relies on this crucial initial step of leveling the surface properly.
How To Lay A 3D Resin Floor?
Laying a 3D resin floor involves several steps, including mixing the resin, applying a primer, pouring the resin, creating the 3D design, and sealing the floor with a protective top coat.
Mixing The Resin
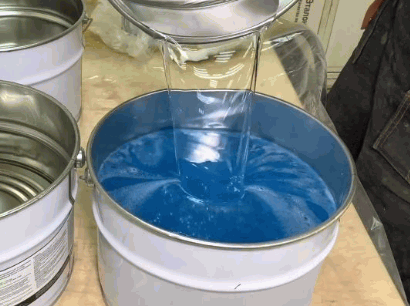
The first step in laying a 3D resin floor is to mix the resin components accurately, ensuring precise measurement and thorough blending for a consistent mixture.
It is crucial to follow the manufacturer’s instructions meticulously when measuring and combining the resin components. Each resin system has specific ratios and mixing procedures that need to be strictly adhered to for the desired results. Failure to follow these guidelines can lead to improper curing, uneven surfaces, or even a compromised final finish.
To achieve a uniform mixture, always measure the resin and hardener components precisely using graduated containers or digital scales. Mixing tools such as spatulas or stir sticks are essential to ensure thorough blending. It’s recommended to mix the components slowly and methodically, scraping the sides and bottom of the mixing container to incorporate all the materials evenly.
Applying The Primer
Applying the primer to the prepared surface is essential for enhancing adhesion and ensuring the epoxy resin bonds properly to the substrate.
Primers come in various types, including epoxy primers, acrylic primers, and moisture-cure primers, each suitable for different surfaces and applications. To apply the primer evenly, start by mixing it thoroughly to ensure a consistent texture. Use a paintbrush, roller, or sprayer to spread the primer evenly on the surface, working in small sections to prevent drips or uneven coverage.
After application, allow the primer to dry completely according to the manufacturer’s instructions. Drying times can vary depending on the type of primer and environmental conditions but typically range from 30 minutes to a few hours. It is crucial to wait until the primer is fully dry before moving on to the next step of the epoxy resin application process.
Pouring The Resin
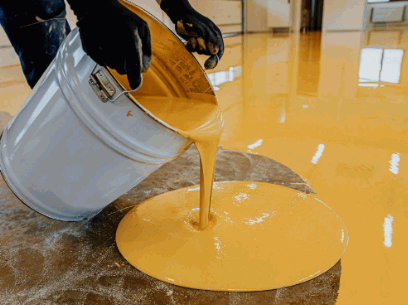
After the primer has dried, the next step is to pour the resin mixture onto the surface, starting with a base coat to create a solid foundation.
As you begin pouring the resin mixture, it’s crucial to work swiftly and efficiently to ensure an even and level base coat. Smooth, uninterrupted movements are key to achieving a uniform finish. Spread the mixture using a notched trowel or squeegee to distribute it evenly across the surface, making sure to cover all areas thoroughly.
Remember that the resin starts to set relatively quickly, so maintaining a steady pace is essential. Avoid overworking the mixture as it can lead to uneven application, creating potential issues later on.
Creating The 3D Design
Creating the 3D design involves applying various techniques such as using stencils and stamps to achieve the desired 3D effect and texture.
When designing a 3D resin floor, selecting the right stencil or stamp is crucial as it determines the overall look of the design. Stencils come in a variety of patterns, from geometric shapes to intricate designs, while stamps offer a more textured finish.
- Stencil types include adhesive stencils for precision, reusable plastic stencils for flexibility, and custom-made stencils for unique designs.
- When applying the stencil, ensure it is securely in place and use a trowel to evenly spread the resin mixture, filling the stencil cavities carefully.
- To enhance the 3D effect, consider layering different stencils or stamps, allowing each layer to dry before adding the next for a realistic and visually appealing result.

Sealing The Floor
The final step in laying a 3D resin floor is sealing it with a top coat, which provides a protective coating and enhances the durability and appearance of the floor.
There are various types of protective coatings that can be used as the top coat on a 3D resin floor. Some common options include polyurethane, epoxy, and acrylic coatings. Each type offers unique benefits, such as chemical resistance, UV protection, and scratch resistance.
When applying the top coat, it is crucial to ensure even coverage across the entire surface to achieve a seamless finish. This can be done using a roller or brush, depending on the type of coating being used. Proper ventilation is also essential to allow the coating to dry properly.
The curing times for different coatings vary but typically range from 12 to 24 hours for light foot traffic and up to 72 hours for full-traffic durability. It is important to follow the manufacturer’s instructions carefully to ensure the top coat cures properly and provides a long-lasting finish.
How To Maintain A 3D Resin Floor?
Maintaining a 3D resin floor is relatively simple, involving regular cleaning and occasional reapplication of the protective coating to keep the floor looking its best.
Regarding cleaning your 3D resin floor, using a gentle pH-neutral cleaner and a soft mop will help prevent any damage to the surface while effectively removing dirt and grime. Stubborn stains can be tackled with a mild vinegar solution or a specially formulated resin floor cleaner.
For minor damages like scratches or small chips, consider using a resin repair kit to patch up these imperfections before they worsen. This proactive approach can help maintain the integrity of your floor and prevent larger repairs down the line.
Don’t underestimate the significance of reapplying the protective coating at regular intervals. This step not only enhances the shine and appearance of the floor but also adds a layer of protection, extending its lifespan and durability. Investing time and effort in these maintenance practices will ensure your 3D resin floor remains a stunning feature in your space for years to come.
 My name is Stacey Reid the senior author at Art Syndicate. I enjoy everything homely and everyday I am amazed at the creativity that I find on the internet to write about and the items that I find to sell to our visitors. I cannot however find everything out there as it is very time consuming so please come and take the time to tell us about something new if you think our visitors would like it.