Are you frustrated by the cracks that keep appearing on your plaster walls? Understanding the causes of these cracks is the first step in effectively repairing them.
We explore the different types of plaster wall cracks, the tools and materials needed for repair, and a step-by-step guide to fixing the damage.
We also discuss preventative measures to avoid future cracks and when it may be necessary to call in a professional. Stick around to learn all you need to know about repairing plaster wall cracks.
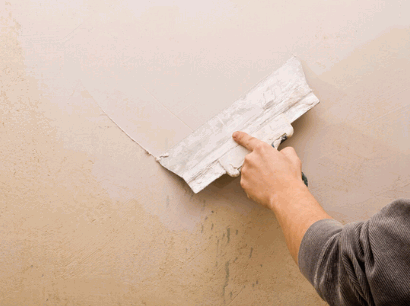
What Causes Cracks In Plaster Walls?
Cracks in plaster walls can be caused by various factors such as settling of the house foundation, humidity changes, or even poor workmanship during the initial plaster application.
When a house settles over time, the foundation shifts, leading to stress on the walls which can result in cracks. Fluctuating humidity levels can cause the plaster to expand and contract, eventually causing it to crack. Poor workmanship, such as improper mixing of plaster or inadequate drying time, can also weaken the plaster’s structure, making it more prone to cracking.
Common scenarios where cracks appear include visible vertical cracks near doors, windows, or corners, as well as hairline cracks that develop over time due to environmental factors. To prevent cracks, ensuring proper foundation maintenance, controlling indoor humidity levels, and hiring skilled professionals for plaster application are essential steps to take.
Uncover more: What Is Venetian Plastering
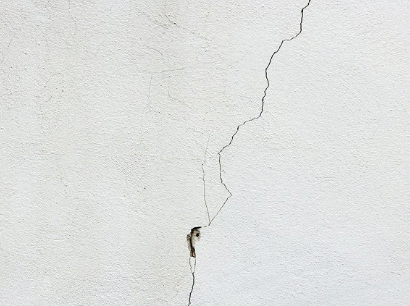
Types Of Plaster Wall Cracks
Plaster wall cracks come in different types, including hairline cracks, wide cracks, and structural cracks, each needing specific repair techniques based on their severity and underlying causes.
Hairline cracks are thin, shallow cracks that may appear as small, almost unnoticeable lines on the wall’s surface. They are commonly found in areas where there is minimal stress, such as along seams or corners. While hairline cracks are typically superficial and not a cause for immediate concern, they can worsen over time if left unattended, leading to water intrusion and larger structural issues.
Wide cracks, on the other hand, are broader and deeper than hairline cracks, often indicating more significant movement or settling in the building. These cracks are usually visible to the naked eye and can be found in areas prone to stress, like above doorways or windows. If ignored, wide cracks can compromise the wall’s integrity, allowing moisture to seep in and further damage the plaster.
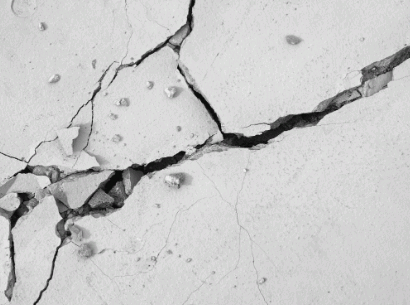
Structural cracks are the most serious type, signaling potential structural damage to the building. These cracks are wider than the hairline and wide cracks, extending through multiple layers of the wall. They are commonly found around load-bearing elements or areas with severe structural issues. Addressing structural cracks promptly is crucial, as they pose a significant risk to the building’s stability and could result in collapse if not repaired correctly.
Hairline Cracks
Hairline cracks in plaster walls are thin, superficial cracks that often occur due to minor shifts in the building structure or temperature fluctuations. These cracks can usually be fixed with a simple application of the joint compound.
Characterized by their slender appearance, hairline cracks are typically less than 1/16 inch wide, making them easy to miss at first glance. These cracks are considered cosmetic issues rather than structural concerns, but it’s essential to address them promptly to prevent further damage. Common causes of hairline cracks include the natural settling of a house, moisture fluctuations, or poor workmanship during the initial construction.
Repairing these cracks is a straightforward DIY task that involves filling the crack with a joint compound, smoothing it out with a putty knife, and sanding it down once dry. This process helps restore the wall’s appearance, creating a seamless surface ready for painting or further decoration.
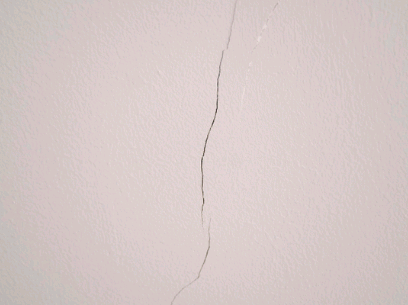
Wide Cracks
Wide cracks in plaster walls are more concerning as they indicate potential structural issues or significant shifts in the building’s foundation. Repairing wide cracks often involves stabilizing the underlying structure before patching the plaster.
Identifying the root cause of these wide cracks is crucial in ensuring a lasting solution. Factors such as moisture infiltration, settling of the foundation, or structural stresses can contribute to the development of such cracks. Conducting a thorough inspection by a professional can help pinpoint the exact source of the problem.
In terms of repairs, focusing on structural stability is paramount. Simply patching up the plaster without addressing the underlying issue may lead to recurring cracks and further damage down the line. In some cases, structural reinforcement or foundation repairs may be necessary to prevent future issues.
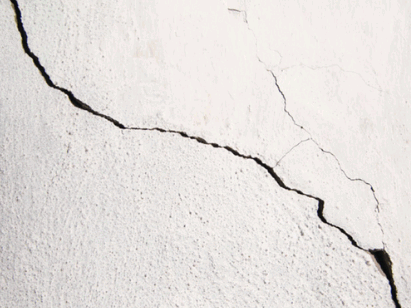
Structural Cracks
Structural cracks in plaster walls are severe and may indicate significant problems such as foundation issues or structural damage. These cracks often extend through the plaster and may require professional intervention to assess and repair.
Foundation settling is one common cause of structural cracks in plaster walls, where the shifting of the building’s base leads to visible damage. Prolonged exposure to structural stress can weaken the integrity of the walls, resulting in cracks. It is crucial to address these issues promptly to prevent further damage and ensure the safety of the building’s structure. Professional inspectors have the expertise to identify the root causes and recommend the most suitable repair solutions, which may involve reinforcing the foundation or applying specialized plaster restoration techniques.
Tools And Materials Needed For Repairing Plaster Wall Cracks
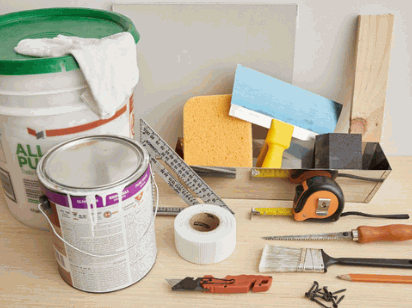
Repairing plaster wall cracks requires specific tools and materials such as joint compound, sandpaper, putty knife, paint, and primer to achieve a seamless repair and finish.
You will need a utility knife for cutting out loose plaster, a drywall saw for making precise cuts, and a vacuum cleaner to remove dust and debris. Mesh tape is crucial for reinforcing the repair area, while a trowel helps in spreading and smoothing the joint compound. Don’t forget to have a drop cloth to protect your surroundings. These items can be found at hardware stores, home improvement centers, or online retailers. Understanding how to properly apply each tool and material is vital for a successful plaster wall repair project.
Step-By-Step Guide For Repairing Plaster Wall Cracks
Repairing plaster wall cracks can be done effectively by following a structured step-by-step guide that involves preparing the area, applying plaster patching compound, sanding, priming, and painting the patched area for a seamless finish.
Once you have gathered all the necessary tools and materials, the first step in repairing plaster wall cracks is to carefully clean the area around the crack to remove any loose debris and dust. Use a scraper or putty knife to gently chip away any loose plaster around the crack.
Next, mix the plaster patching compound according to the manufacturer’s instructions. Apply the compound to the crack using a putty knife, making sure to fill the entire crack and smooth out the surface. Allow the compound to dry completely before moving on to the next step.
After the compound has dried, use fine-grit sandpaper to sand the patched area until it is smooth and level with the surrounding wall. Wipe away any dust with a damp cloth before priming the area.
Apply a coat of primer to the patched area to ensure proper adhesion of the paint. Once the primer has dried, you can proceed to paint the patched area with a color that matches the rest of the wall. Take your time and apply thin, even coats of paint for a professional-looking finish.
Step 1: Prepare The Area
Before repairing plaster wall cracks, it is essential to prepare the surrounding area by clearing debris, ensuring a clean surface, and protecting adjacent surfaces from dust or damage during the repair process.
One crucial preparatory step before addressing plaster wall cracks is to inspect the extent of the damage thoroughly to understand the underlying issue. This assessment will help determine the appropriate materials and techniques needed for a successful repair.
Creating a well-lit workspace is vital to accurately identify all cracks and ensure a precise application of repair materials. Gather all necessary tools and materials such as plaster mix, sandpaper, putty knife, and protective gear before starting the repair process.
Step 2: Clean The Crack
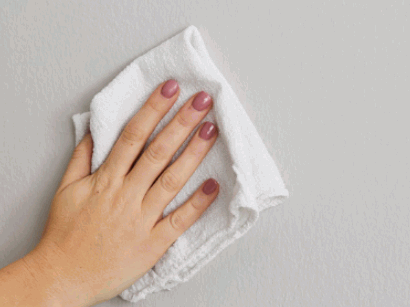
Cleaning the crack in plaster walls involves removing loose debris, dust, and old plaster to create a smooth surface for applying the joint compound. A clean crack ensures better adhesion and a seamless repair.
Properly cleaning the crack before repairing is crucial as it allows for a strong bond between the patch material and the existing plaster, preventing future cracks or crumbling.
Thoroughly cleaning the crack involves using tools such as a stiff brush, putty knife, and vacuum to ensure all loose particles are removed.
By eliminating any contaminants, dirt, or loose material, you create an ideal base for the patching material to adhere to.
Step 3: Apply Plaster Patching Compound
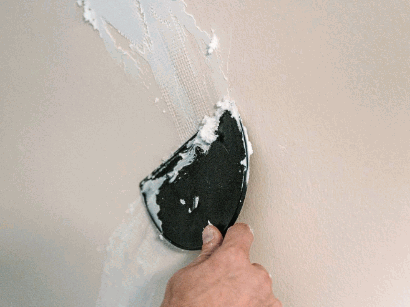
Applying plaster patching compound to the cleaned crack is a crucial step in the repair process, as it fills the gaps and creates a seamless surface for sanding and finishing. The compound should be spread evenly and allowed to dry as per the manufacturer’s instructions.
Ensure that the area surrounding the crack is clean and free of dust or debris before applying the compound. Use a putty knife to carefully fill the crack with the plaster patching compound, ensuring it is slightly raised above the surface for sanding down later.
Smooth out any excess compound with the putty knife to create a level finish.
It is essential to be patient during the drying process; rushing it may lead to cracking or an uneven surface. Once fully dry, gently sand the patched area to blend it seamlessly with the rest of the wall.
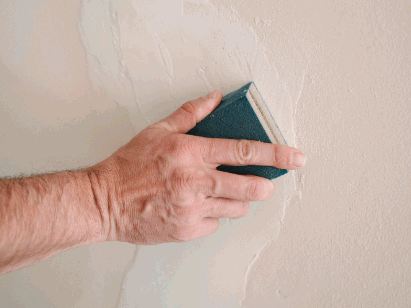
Step 4: Sand And Smooth The Patch
After the plaster patching compound has dried, sanding the patch smoothens the surface and blends it seamlessly with the surrounding wall. Use fine-grit sandpaper and gentle strokes to achieve a professional finish.
When sanding the patched area, start with a fine-grit sandpaper such as 120-grit to gently smooth out any raised edges or rough spots. It’s crucial to maintain even pressure and use gentle strokes to avoid creating uneven surfaces.
Progress to a higher grit, around 220-240, for a finer finish, continuing with the same gentle technique. Be sure to feather the edges of the patch to blend seamlessly with the rest of the wall, creating a polished appearance.
Step 5: Prime The Patched Area
Priming the patched area before painting is essential as it helps seal the repair and provides a uniform surface for painting. Choose a high-quality primer suitable for plaster walls to enhance the adhesion and finish of the paint.
Applying primer acts as a barrier to prevent the paint from being absorbed unevenly, ensuring a smooth and professional-looking finish. When working with plaster walls, it’s crucial to select a primer that is specifically formulated for porous surfaces like plaster. Oil-based primers are generally recommended for their excellent adhesion and stain-blocking properties. Apply the primer in thin, even coats using a brush or roller, allowing sufficient drying time between coats as per the manufacturer’s instructions. Properly priming the patched areas can also help the paint color appear more vibrant and true to its original shade.
Step 6: Paint The Patched Area
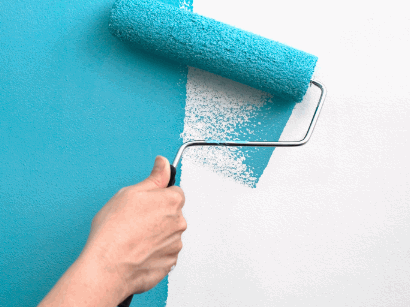
Painting the patched area is the final step in repairing plaster wall cracks, providing a seamless finish that matches the existing wall color and texture. Use high-quality paint and apply it evenly for a professional outcome.
It is crucial to select the right type of paint that adheres well to the patched area and blends seamlessly with the rest of the wall. Consider the finish of the existing paint and choose a similar sheen for a consistent look.
Color matching is another key aspect to ensure that the repaired area seamlessly integrates with the surrounding wall. Use color swatches or consult a professional to find the perfect match.
In terms of application techniques, start by feathering the edges of the patched area with a brush to create a smooth transition. Apply multiple thin coats rather than one thick layer for a more even finish.
Preventative Measures To Avoid Plaster Wall Cracks
To prevent future cracks in plaster walls, homeowners can take proactive measures such as addressing foundation issues, maintaining consistent indoor humidity levels, and using high-quality paint that offers better protection against environmental factors.
Regular inspections play a crucial role in identifying any early signs of cracks or damage, allowing for timely repairs before they escalate. Ensuring that downspouts and gutters are directing water away from the foundation can also help prevent moisture seepage and subsequent wall deterioration.
Applying a sealant specifically designed for plaster walls can provide an extra layer of protection and help maintain the integrity of the surface over time. Avoiding hanging heavy objects directly on plaster walls and using proper installation techniques for fixtures and shelves can reduce the risk of structural stresses leading to cracks.
When To Call A Professional
While DIY repair methods can address minor plaster wall cracks, homeowners should consider calling a professional when dealing with extensive structural cracks, recurring issues, or uncertain repair outcomes.
Structural cracks in plaster walls can often signify underlying issues within the building’s framework. These cracks may be symptoms of a more serious problem, such as foundation settling or structural movement. Addressing these issues requires a thorough understanding of construction principles and materials. Professionals have the expertise to assess the root cause of the cracks and implement effective repair solutions that will ensure the long-term stability of the structure.
Choosing reputable professionals is crucial in this process. Look for experienced contractors or companies with a proven track record in handling plaster wall repairs. Reading reviews and checking references can help gauge the quality of their work and customer satisfaction. It’s important to find professionals who prioritize structural integrity and use high-quality materials for lasting repair.
Conclusion
Repairing cracks in plaster walls is a manageable task that can enhance the aesthetics and structural integrity of your living space. By understanding the causes of cracks, using the right tools and techniques, and knowing when to seek professional help, homeowners can maintain their plaster walls effectively.
Regular maintenance of plaster walls plays a crucial role in preventing extensive damage and preserving the charm of your home. Addressing minor cracks promptly can save you from costly repairs in the future.
Implementing proactive measures, such as keeping humidity levels in check and inspecting for any signs of deterioration, can prolong the lifespan of your plaster walls.
Remember, a small crack today might lead to a major issue tomorrow. So, prioritize timely repairs and care to ensure the longevity and beauty of your walls.
 My name is Stacey Reid the senior author at Art Syndicate. I enjoy everything homely and everyday I am amazed at the creativity that I find on the internet to write about and the items that I find to sell to our visitors. I cannot however find everything out there as it is very time consuming so please come and take the time to tell us about something new if you think our visitors would like it.