Ceilings may develop cracks over time, which can detract from the overall aesthetic appeal of a home. It is essential to understand the causes of these cracks and to be knowledgeable about the proper preparation required for painting the ceiling, as this is crucial to restoring its former charm. This article outlines the essential steps for preparing your ceiling, recommends the best types of paint to effectively cover unsightly cracks, and identifies top paint brands that provide excellent results. Whether you are a DIY enthusiast or a novice painter, this guide offers practical tips and valuable insights.
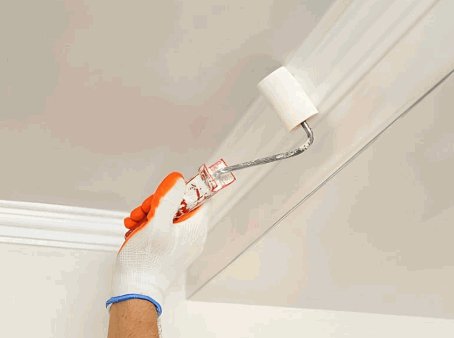
What Causes Cracks In Ceilings?
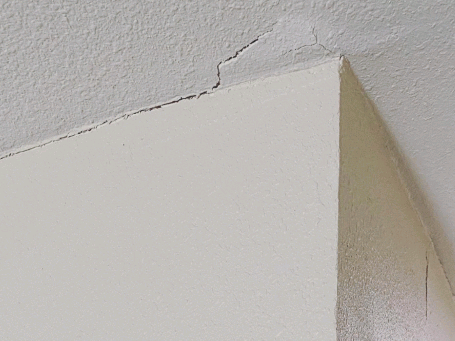
Ceiling cracks may arise from a variety of factors, including the natural settling of a structure, as well as fluctuations in temperature and humidity that impact the materials utilized in ceiling construction.
Over time, issues such as water damage, improper installation, or the aging of plaster can intensify these problems, resulting in visible cracks that vary from hairline fractures to more substantial fissures. This often requires a plaster repaint to restore the ceiling’s appearance.
It is imperative for homeowners to remain vigilant in identifying the underlying causes of these cracks in order to effectively manage ceiling repair and maintenance, particularly in areas such as the kitchen, where moisture and temperature changes are prevalent.
How To Prepare Your Ceiling For Painting?
Preparing the ceiling for painting is a crucial step to achieve a flawless finish, particularly when addressing repairs and surface imperfections. Proper preparation not only enhances paint adhesion but also contributes to a uniform and aesthetically pleasing appearance.
It is essential to evaluate the condition of the ceiling, fill any visible cracks, and ensure the surface is smooth prior to the application of ceiling paint. This process may involve utilizing joint compound or caulking compound to rectify any blemishes, followed by sanding and priming the surface to achieve optimal results.
Clean The Ceiling
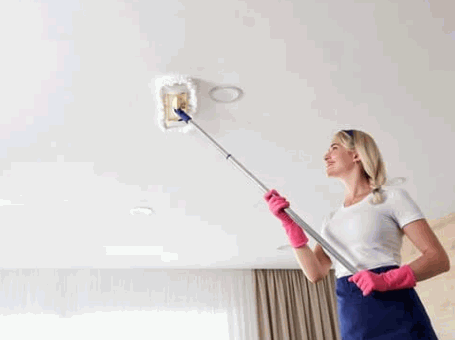
Thorough cleaning of the ceiling is the initial and critical step in ensuring a successful paint application, as it effectively removes dust, grease, and other contaminants that may compromise paint adhesion. Utilizing appropriate painting tools, such as a sponge and roller cover, can facilitate the elimination of surface grime, particularly in kitchens where steam and cooking residues tend to accumulate over time. A clean surface is essential for any necessary repairs and for achieving a uniform finish with ceiling paint.
To attain optimal results, it is advantageous to implement a variety of effective cleaning techniques and efficient tools specifically designed for ceiling preparation. Commence by utilizing a vacuum cleaner equipped with a brush attachment to remove larger dust particles and cobwebs that may have settled in corners. For persistent stains, a mixture of warm water and an appropriate cleaning solution can be employed, while a ladder or extension pole fitted with a microfiber cloth can assist in reaching high, inaccessible areas.
- A combination of a sponge and bucket is ideal for detailed cleaning.
- Consider utilizing a diluted vinegar solution, which is effective in removing grease.
- For particularly stubborn stains, a gentle scrub brush can prove to be highly effective.
This comprehensive approach not only ensures the removal of dirt but also enhances the surface, thereby allowing for excellent paint adherence and a flawless finish.
Repair Any Cracks Or Holes
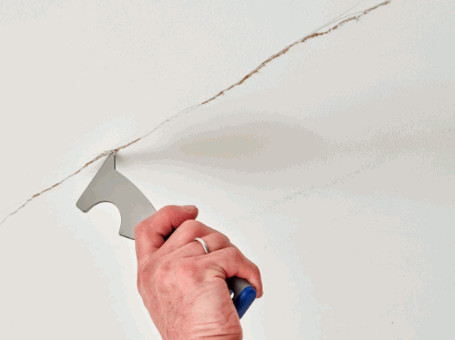
Repairing any cracks or holes in the ceiling is essential to achieving a smooth surface prior to painting, as this prevents imperfections from surfacing even with high-quality ceiling paint. The use of products such as joint compound, drywall mesh tape, or elastic caulk can effectively fill visible cracks and gaps, ensuring that the kitchen ceiling is both structurally sound and visually appealing. Proper repair techniques will significantly contribute to the overall durability and aesthetics of the finished paint job.
To initiate the repair process, it is important to conduct a thorough inspection of the ceiling for any signs of damage or ceiling imperfections. Identifying and addressing these issues promptly will enhance the longevity of the repairs. It is advisable to gather the following materials:
- Joint compound
- Drywall mesh tape
- Elastic caulk
- Putty knife
- Sandpaper
Begin by cleaning the area surrounding the crack or hole to remove any loose debris. For small cracks, apply a coat of joint compound and smooth it with a putty knife. For larger gaps, place drywall mesh tape over the crack before applying the joint compound. Once dried, sand the area to create a seamless surface.
For flexible cracks, it may be beneficial to use elastic caulk, which accommodates minor movements without the risk of cracking again. Achieving a flawless ceiling will ultimately enhance the overall appearance of the room.
Sand The Surface
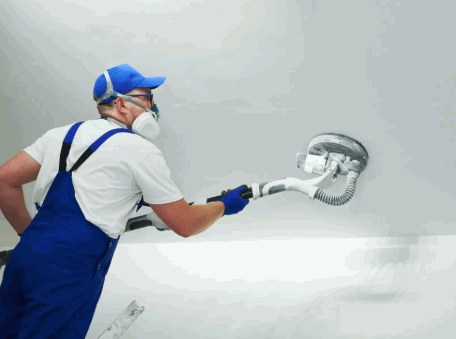
Sanding the surface of the ceiling after repairs is essential for achieving a smooth and even texture, which enhances paint adhesion and improves the overall finish. By addressing any remaining surface imperfections, sanding ensures that the ceiling paint will be applied uniformly. Care must be taken to avoid excessive sanding, as this could damage the underlying material, particularly with plaster or drywall surfaces.
To achieve optimal results, it is advisable to consider the following best practices for sanding:
- Choose the Right Sandpaper: Utilize finer grits for finishing and coarser grits for initial sanding to effectively remove imperfections.
- Use Proper Technique: Sand in a circular motion or along the grain of the material to create a consistent surface.
- Ensure Adequate Lighting: Sufficient visibility is crucial for identifying any remaining flaws that may require additional attention.
- Clean Thoroughly: After sanding, wipe the surface with a damp cloth to remove dust, as this can impede paint adhesion.
By adhering to these guidelines, one can significantly enhance the quality of the ceiling finish, ensuring a professional appearance and long-lasting results. This contributes to the overall ceiling paint benefits.
Prime The Ceiling
Applying a quality paint primer is a critical step in the ceiling painting process, as it significantly enhances paint coverage and ensures the longevity of the ceiling paint. A primer serves to seal the surface, provide a uniform base for the ceiling paint, and improve the adhesion of the topcoat. This is particularly advantageous when addressing repaired areas or transitioning from a darker color. Such a foundational layer is essential for achieving a flawless and professional-looking finish.
The benefits of utilizing paint primer are numerous, particularly concerning ceilings. By selecting the appropriate type of primer, one can expect not only improved durability but also a considerable reduction in the number of paint coats required. For example, primers specifically formulated for ceilings are often designed to minimize splatter and create a smooth surface for subsequent applications, thereby greatly reducing the overall time and effort involved in the painting process.
- Oil-based primers are highly effective for sealing stains, especially in older homes, ensuring that unsightly marks do not bleed through the fresh coat.
- Water-based primers are compatible with most ceiling paints, offering the advantage of easy cleanup and quicker drying times, which is particularly beneficial in busy environments.
- For moisture-prone areas, mold-resistant primers provide an additional layer of protection, safeguarding the finish from damage associated with dampness.
Understanding these options not only enhances the aesthetic appeal of the ceiling but also improves its practical performance, creating an environment that is both visually appealing and functional.
What Type Of Paint Is Best For Covering Cracks?
Selecting the appropriate type of paint is critical for effectively addressing cracks in ceilings, as various ceiling paint types provide differing levels of flexibility, coverage, and durability.
Latex paint is frequently regarded as the most suitable choice for interior ceilings due to its ease of application and rapid drying characteristics. Nevertheless, acrylic and oil-based paints possess distinct advantages that may be advantageous depending on the specific conditions and requirements of the area being painted.
Learn more: How To Paint The Roof Of A House
Latex Paint
Latex paint is a highly regarded option for ceilings, owing to its advantageous properties, including low odor, ease of application, and rapid drying times. These characteristics render it a practical choice for both do-it-yourself enthusiasts and paint professionals. This water-based paint offers good paint coverage and can be easily cleaned with soap and water, which is particularly beneficial in high-traffic areas such as kitchens.
Along with these features, latex paint demonstrates considerable versatility, being suitable for a range of ceiling types, including drywall, plaster, and textured surfaces. Its flexibility enables it to adhere effectively, thereby minimizing the risk of cracking over time.
The availability of various finishes—from matte to semi-gloss—further enhances its appeal, allowing users to select the ideal aesthetic for their environment.
- Low Maintenance: Latex paint typically requires less maintenance compared to oil-based alternatives.
- Environmental Friendliness: As a water-based product, it emits fewer volatile organic compounds (VOCs), making it a safer choice for maintaining indoor air quality.
Utilizing latex paint for ceiling applications not only enhances the visual dynamics of a room but also contributes positively to its maintenance and overall health.
Acrylic Paint
Acrylic paint is renowned for its flexibility and strong adhesion properties, rendering it an excellent choice for ceilings that may undergo slight movements or temperature fluctuations. This type of paint is also resistant to yellowing over time and offers a durable finish that withstands the test of time, particularly in areas susceptible to moisture and humidity.
When evaluating the unique characteristics of acrylic paint, it is essential to consider its performance under various conditions.
- One significant advantage is its ability to expand and contract without cracking, which is critical in environments that experience regular thermal changes.
- The quick-drying nature of acrylic paint facilitates faster project completion, allowing for surfaces to be painted and recoated within a shorter time frame.
- Its water-based composition ensures that clean-up is efficient and straightforward, making it more convenient than oil-based paints.
The superior adhesion properties of acrylic paint also make it suitable for ceilings composed of different materials, ensuring a lasting bond that can withstand wear and tear. Whether addressing a residential or commercial project, these attributes establish acrylic paint as the optimal choice for ceiling applications.

Oil-based Paint
Oil-based paint is well-regarded for its durability and smooth finish, making it an appropriate choice for ceilings that necessitate a robust and long-lasting solution. Although it can be more challenging to apply due to its extended drying times and strong odors, the final result typically yields a beautiful, glossy finish that effectively conceals imperfections and provides excellent coverage over cracks.
This type of paint often possesses superior adhesion and resistance to wear and tear, rendering it a preferred option for high-traffic areas and spaces susceptible to moisture. Several considerations should be acknowledged:
- Pros: Exceptional durability, the capacity to withstand cleaning, and an elegant finish.
- Cons: Extended drying times, the potential for strong fumes, and more complex cleanup following application.
Despite these challenges, many individuals favor oil-based paint for its unparalleled resilience, particularly in environments where ceilings are frequently subjected to stress or humidity.
By carefully assessing these factors, one can more easily determine whether this option aligns with specific project requirements.
What Are The Best Ceiling Paint Brands To Cover Cracks?
In the selection of the most suitable ceiling paint brands for covering cracks, several reputable manufacturers are noteworthy, including Benjamin Moore, Kilz, Behr, Sherwin-Williams, and Glidden.
Each of these brands provides a range of ceiling paint types specifically formulated to deliver exceptional coverage, durability, and aesthetic appeal. This ensures that homeowners can identify the ideal product to meet their particular requirements while effectively addressing surface imperfections.
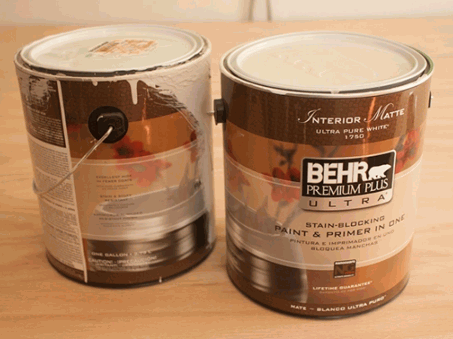
Behr Premium Plus Ultra
Behr Premium Plus Ultra is highly regarded for its exceptional coverage and ease of application, positioning it as a preferred option for homeowners seeking to effectively address ceiling cracks. This paint incorporates advanced technology that yields a smooth finish while enhancing durability, ensuring long-lasting results that withstand wear and tear, particularly in high-traffic areas.
Along with its impressive coverage, the formulation of this paint provides excellent adhesion, thereby mitigating the risks of peeling and chipping over time. Homeowners will also appreciate the low VOC content, which contributes to improved indoor air quality while still delivering a beautiful and enduring finish.
The additional benefits include:
- Effortless Application: This paint applies smoothly, resulting in minimal roller marks.
- Quick Drying: The rapid drying time facilitates faster project completion, allowing for the application of multiple coats if necessary.
- Stain Resistance: This feature is particularly beneficial for ceilings in kitchens and bathrooms, where moisture and stains are often prevalent.
Behr Premium Plus Ultra not only effectively conceals ceiling imperfections but also enhances the aesthetic appeal of any space, making it a reliable choice for a variety of projects.
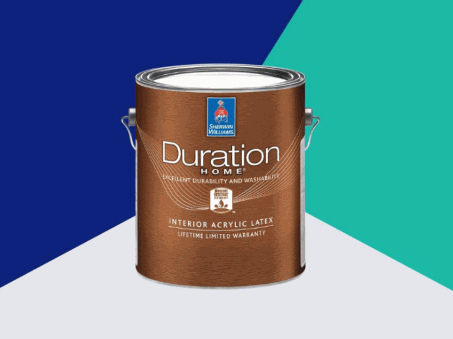
Sherwin-Williams Duration Home
Sherwin-Williams Duration Home is renowned for its superior quality and durability, offering exceptional resistance to stains and mildew, which makes it particularly suitable for maintaining a pristine appearance in kitchens and bathrooms. This ceiling paint is specifically formulated to cover cracks and imperfections while delivering a smooth, luxurious finish that enhances the overall aesthetic of any room.
Its advanced formulation ensures that surfaces can endure the demands of daily living, particularly in high-traffic areas and damp environments. Homeowners and designers alike value the reliability of this paint when utilized in spaces susceptible to moisture, where conventional paints may underperform.
The exceptional performance of Sherwin-Williams Duration Home not only prolongs the lifespan of painted surfaces but also fosters safer, healthier living conditions by inhibiting the growth of mold and mildew.
Key attributes of this product include:
- Long-lasting color retention
- Easy-to-clean surfaces
- Low VOC emissions for improved indoor air quality
These characteristics make it an excellent choice for individuals seeking both aesthetic appeal and the practicality of a durable and resilient finish.
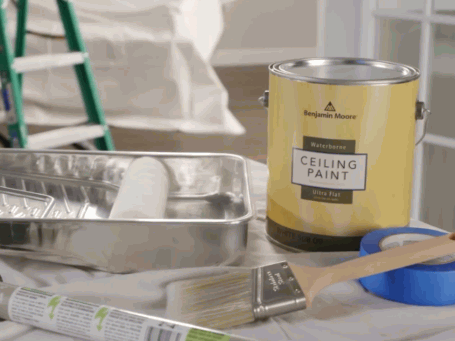
Benjamin Moore Waterborne Ceiling Paint
Benjamin Moore Waterborne Ceiling Paint is highly esteemed for its superior coverage and low splatter formula, making it a preferred choice among painting professionals and DIY enthusiasts. This paint dries rapidly and provides a uniform, matte finish that effectively conceals visible cracks and surface imperfections, ensuring an aesthetically pleasing result in any ceiling application.
The formulation of this paint is specifically designed to minimize odor, thereby creating a more pleasant working environment, and it is suitable for use in both residential and commercial settings. Users can anticipate exceptional results even on challenging surfaces, owing to its advanced technology that enhances adhesion.
A notable feature of this product is its excellent touch-up capability, enabling seamless blending of new applications with existing layers. Whether one is refreshing a single room or undertaking a comprehensive renovation, the advantages of this ceiling paint become readily apparent.
Key features include:
- Quick drying time
- Low odor for a comfortable application
- Exceptional adhesion on varied surfaces
In summary, this outstanding product exemplifies quality and reliability in ceiling treatments.
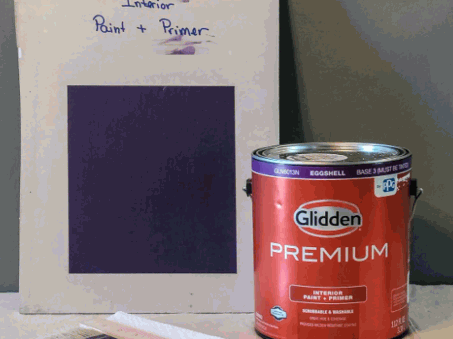
Glidden Interior Latex Ceiling Paint
Glidden Interior Latex Ceiling Paint represents a cost-effective solution that does not compromise on quality, delivering substantial coverage and a smooth finish for ceilings. This paint is user-friendly and particularly effective in concealing minor cracks and imperfections, making it an excellent choice for those seeking to refresh their ceilings without incurring significant expenses.
Homeowners in search of a cost-effective painting solution will discover that this product offers exceptional value. It combines affordability with an impressive finish, facilitating a complete transformation of the interior space without the substantial costs typically associated with renovations.
The paint is formulated to provide excellent coverage, which means that less product is needed for the job—an important advantage for budget-conscious individuals. As you evaluate your options, consider the following benefits:
- Ease of application: Its smooth consistency allows for quick and efficient coverage.
- Durability: Designed to withstand the test of time, it ensures long-lasting results.
- Versatility: Suitable for various interior settings, making it a practical choice for different projects.
By selecting this paint, users can achieve a professional-looking finish while remaining within a reasonable budget, making it a prudent decision for home improvement enthusiasts.
What Are The Factors To Consider When Choosing A Ceiling Paint?
When selecting ceiling paint, several critical factors must be considered, as they can significantly influence both the application process and the final appearance of the ceiling. Key considerations include:
- Coverage
- Durability (including paint thickness and paint viscosity)
- Ease of application
- Cost
These elements, including paint quality and paint characteristics, will determine the overall success of the ceiling painting project. A thorough evaluation of these factors ensures that homeowners invest in a product that meets their specific requirements while effectively addressing any existing imperfections or cracks.
Coverage
Coverage is a critical factor to consider when selecting ceiling paint, as it significantly impacts the number of coats required and the overall efficiency of the application process. A thorough understanding of coverage not only influences the final appearance of the ceiling but also plays a vital role in determining the durability of the applied finish.
When choosing ceiling paint, it is essential to recognize that a high-quality product with excellent coverage can yield a more uniform and visually appealing result. This reduces the likelihood of streaks or uneven patches, which can detract from the aesthetics of a freshly painted ceiling. Different types of paint, such as matte, eggshell, or satin, may demonstrate varying thicknesses, affecting their interaction with surface imperfections, matching texture, and their light absorption properties.
- High-coverage paints, such as Kilz ceiling paint, typically contain a greater density of pigments, enhancing their ability to conceal underlying surfaces effectively.
- Conversely, low-coverage options may require additional layers, which can increase labor time and the overall cost of the project.
Ultimately, selecting the appropriate paint with superior coverage not only ensures efficiency during application but also enhances the quality and longevity of the finished ceiling.
Durability
Durability is a critical factor to consider when selecting ceiling paint, as it significantly influences the paint’s ability to endure over time and withstand environmental conditions. Paints with enhanced durability are better suited to resist fading, chipping, and peeling, particularly in areas susceptible to moisture or temperature fluctuations, such as kitchens. Investing in durable ceiling paint ensures that the finish remains intact, thereby reducing the need for frequent touch-ups.
Choosing ceiling paint with superior durability guarantees a visually appealing appearance over the years.
- Paint longevity directly affects maintenance requirements; less frequent maintenance results in cost savings and increased convenience.
- The selection of a robust paint, like Benjamin Moore, can greatly enhance the aesthetic appeal of a room by preserving vibrant colors despite environmental challenges.
- Conditions such as humidity and extreme heat can adversely impact standard paints, leading to unsightly marks and an unkempt appearance.
Consequently, considering the durability of ceiling paint is essential for both homeowners and professionals to ensure long-lasting beauty and satisfaction.
Ease Of Application And Paint Techniques
The ease of applying ceiling paint can significantly influence the overall painting experience and satisfaction with the final result.
Selecting the appropriate ceiling paint not only simplifies the project but also enhances the overall aesthetic of the room. Many professional painters favor products with high opacity, as these paints typically require fewer coats, thereby conserving both time and effort.
Regarding application tools, rollers with extended handles are particularly effective for accessing elevated areas, while angled brushes are ideal for detailing trim and corners. Employing techniques such as cutting in prior to rolling and spray painting can further streamline the application process. Among the various methods available, utilizing a spray gun can deliver a flawless finish, especially in expansive spaces or complex designs.<
Additional considerations include the use of a paint sprayer:
- Rapid drying times, which enhance efficiency.
- Knockdown textures that may necessitate specific rollers.
- The use of painter’s tape to ensure clean and precise lines.
- Fill in hairline cracks with a jointing compound or compound mixture.
Price
Price is a significant consideration when selecting ceiling paint, as it can vary considerably across different brands and types. While it is essential to strike a balance between quality and cost, numerous budget-friendly options are available that still offer excellent coverage and durability for effective ceiling repair and painting. Homeowners should evaluate their budget while also considering the long-term benefits of investing in high-quality paint for their ceilings.
When assessing options, it is imperative for consumers to explore various brands and types, as some may provide better value than others. Although investing in high-quality ceiling paint may appear more expensive initially, the long-lasting results can justify the upfront costs. Many affordable products on the market promise ease of application and solid coverage, which can lead to significant savings in both time and money over time.
The following factors should be kept in mind:
- Durability: Seek paints that resist discoloration and wear.
- Finish: Consider whether a flat, eggshell, or satin finish will best suit the ceiling.
- Coverage: A paint that offers single-coat coverage can substantially reduce additional costs.
Ultimately, the objective should be to achieve a balance that meets budgetary constraints without compromising the desired quality and performance of the paint.
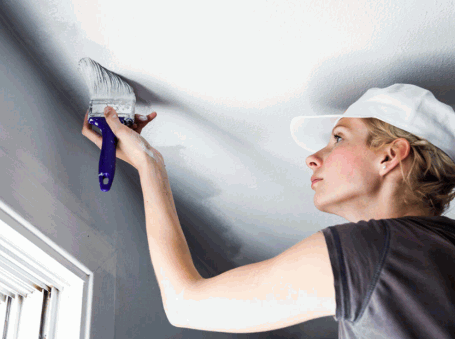
How To Paint Your Ceiling To Cover Cracks?
Painting the ceiling to effectively cover cracks necessitates a strategic approach that includes the use of proper application techniques and the appropriate tools for the task. To attain a flawless finish, it is essential to begin with high-quality ceiling paint and utilize suitable instruments, such as rollers for expansive areas and brushes for edges and corners. Consider the use of elbow grease for tougher surfaces.
In some cases, multiple coats may be required to achieve sufficient coverage, particularly when addressing prominent cracks or imperfections.
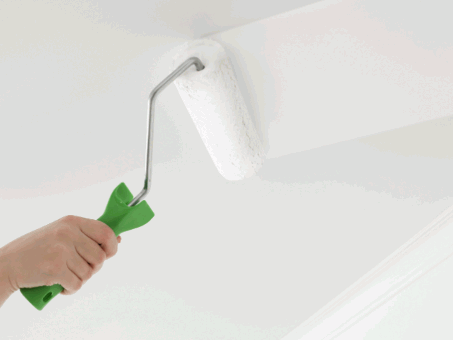
Use A Roller
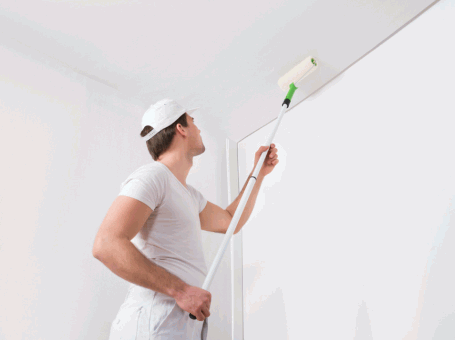
Utilizing a roller for the application of ceiling paint is regarded as one of the most efficient methods for achieving a uniform coat, particularly when addressing expansive areas. A high-quality roller cover specifically designed for ceiling textures is essential to ensure the even distribution of paint, which minimizes the visibility of brush strokes and enhances coverage over existing cracks or blemishes.
When evaluating the advantages of this technique, it is imperative to acknowledge that employing a roller can significantly reduce the time required for the project while simultaneously improving the final outcome. Consider water-blocking techniques for moisture-prone areas like kitchens. By selecting a roller specifically designed for ceilings, users can expect a smooth finish and greater ease in accessing high or awkward spaces without undue strain.
Rollers featuring thicker naps are particularly effective for creating texture and concealing imperfections, while those with a smoother finish are better suited for achieving a flawless appearance on flat ceilings. Proper application technique involves evenly loading the roller and maintaining consistent pressure throughout the process, ensuring that the paint flows smoothly and adheres effectively. Using blemish spray can help in achieving a perfect finish.
Furthermore, selecting the appropriate roller cover is critical, as different surface materials necessitate specific types of covers to achieve optimal results.
Use A Brush
Utilizing a paintbrush is essential for achieving precision when painting around the edges and corners of the ceiling, ensuring a clean and professional finish. A high-quality paint brush provides better control in tight spaces and is particularly effective for touching up areas that a roller may not adequately reach, especially around fixtures or along walls.
When considering the most effective techniques for ceiling painting, the use of a brush is critical for enhancing both the overall quality and longevity of the paint job. This tool is invaluable for detailed work in areas where precision is paramount, including the best option for paint tools:
- Corners: Ensuring a smooth transition between the wall and ceiling.
- Trim: Creating sharp lines along decorative moldings or edges.
- Light Fixtures: Facilitating touch-ups around chandeliers or recessed lights where rollers may be inadequate.
Incorporating a brush not only complements the use of a roller for broader strokes but also enhances the detail in intricate areas, resulting in a cohesive paint finish that endures over time.
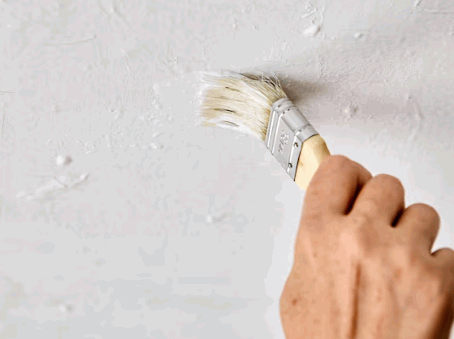
Apply Multiple Coats
Applying multiple coats of paint may be necessary to effectively cover ceiling cracks and achieve an even finish, especially when filling cracks or transitioning from a darker to a lighter color or when working with textured surfaces. It is crucial to allow each coat to dry completely before applying the next, as this practice not only enhances paint adhesion but also improves the overall coverage and appearance of the ceiling, especially when matching paint texture to interior matte finishes.
In general, multiple layers are essential for attaining a smooth and consistent look. It is advisable to wait for at least the recommended drying time indicated on the paint can—typically between 2 to 4 hours—before applying subsequent layers. Utilizing techniques such as rolling in one direction with a paint roll or following the natural contours of the ceiling can help prevent lap marks and ensure uniform coverage.
- Consider using a high-quality primer, particularly when covering stains or making significant color changes.
- Employing a paint sprayer can yield faster results; however, it requires caution to avoid overspray and ensure an even finish.
By adhering to these recommendations, one can achieve a flawless ceiling devoid of imperfections. Whether you are painting a kitchen or another interior wall, these tips will help you achieve the best results.
Let The Paint Dry Completely For Optimal Results
Allowing the paint to dry completely is a critical final step in the ceiling painting process, as it ensures that the finish sets properly and achieves the desired quality of the ceiling paint. Proper paint drying time is essential to avoid issues such as bubbling or flaking in the future.
During the drying process, factors such as temperature and humidity can significantly impact the curing of the paint. Therefore, it is imperative to adhere to the manufacturer’s guidelines to achieve the best results. Higher humidity levels can slow down evaporation, resulting in extended drying times, while excessive heat may cause the paint to dry too quickly, compromising its adherence and finish.
It is advisable to monitor the environmental conditions during application and consider the following parameters:
- Temperature: Ideally, paint should be applied when temperatures range from 50°F to 85°F.
- Humidity: Aim for relative humidity levels between 30% and 70% for optimal results.
By being attentive to these factors, one can ensure that the ceiling paint attains a durable and aesthetically pleasing finish, thereby enhancing the overall quality of the work.
 My name is Stacey Reid the senior author at Art Syndicate. I enjoy everything homely and everyday I am amazed at the creativity that I find on the internet to write about and the items that I find to sell to our visitors. I cannot however find everything out there as it is very time consuming so please come and take the time to tell us about something new if you think our visitors would like it.