Vinyl fencing is a popular choice due to its durability and low maintenance. But, over time, stains can appear on the fence, which affects its look. Here, we’ll learn how to get rid of the stains.
Mix warm water and mild dish soap in a bucket. Get a soft cloth or sponge. Scrub the stained areas of the fence with it. Rinse off with clean water. Do this again if needed. This works well for dirt and grime buildup.
You can also buy a specialized vinyl cleaner from hardware or home improvement stores. Follow the instructions given by the maker to apply the cleaner and get rid of the stains.
For tougher stains, like mold or mildew, you may need a bleach solution. Mix one part bleach and nine parts water in a bucket. Apply the solution to the stained areas with a cloth or sponge. Let it sit for a few minutes. Then, rinse off thoroughly with clean water. Wear protective gloves and eyewear when handling bleach. Make sure the area is well-ventilated.
Remember, bleach can discolor or damage certain types of vinyl fencing. So, test the cleaning solution on a hidden area of the fence first.
Regular cleaning and maintenance of vinyl fencing can make it last longer and look better.

Understanding Vinyl Fencing
Vinyl fencing is a type of fencing that is made from synthetic plastic material. It is commonly used for its durability and low maintenance qualities. Here are five key points to understand about vinyl fencing:
- Vinyl fencing is resistant to rot, fading, and warping, making it a long-lasting choice for outdoor use.
- This type of fencing is available in various styles and colors, allowing homeowners to choose a design that complements their property.
- Installation of vinyl fencing requires specific techniques to ensure stability and proper alignment.
- Regular cleaning and maintenance are necessary to keep vinyl fencing looking its best and to prevent staining.
- Unlike some other types of fencing, vinyl fencing does not require painting or sealing, saving homeowners time and money on maintenance.
In addition to these key points, it is worth noting that vinyl fencing is a popular choice for both residential and commercial properties due to its affordability and versatility. With its ability to withstand harsh weather conditions, vinyl fencing is an excellent investment for property owners.
A fact about vinyl fencing is that it was first introduced in the 1980s as an alternative to traditional wood fencing. Since then, it has gained popularity and become a widely used fencing material.
You don’t have to be a vinyl record collector to appreciate how to get rid of a stain on vinyl fencing.
What Is Vinyl Fencing?
Vinyl fencing is a popular choice for homeowners. It’s a type of fencing made with synthetic materials. It’s durable and low-maintenance which makes it an attractive option for those seeking a long-lasting and cost-effective solution.
The versatility and aesthetic appeal of vinyl fencing is what makes it so popular. It comes in various styles and colors, allowing homeowners to choose a design that complements the look of their property. Vinyl can even mimic the appearance of wood or iron, providing elegance without the extra maintenance.
Vinyl also offers practical benefits. It won’t rot or warp like wood does, making it resistant to weather conditions and pests. Cleaning is also a breeze, as it only requires a quick rinse or wipe-down.
A lesser-known fact: vinyl fencing gained popularity in the 1980s as an alternative to traditional materials. Since then, it has become increasingly popular due to its durability and affordability.
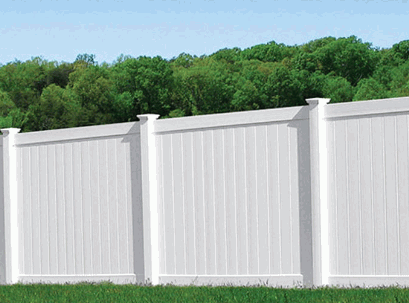
Common Types Of Stains On Vinyl Fencing
Vinyl fencing can get stained and ruin its look and wear. So, it’s important to know what stains can occur and how to take action.
Common stains are:
- Mildew – black or green spots from moisture. Can spread quickly if not taken care of.
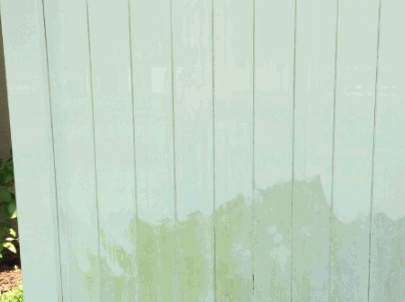
- Rust – orange or brown marks from metal objects. Difficult to remove.
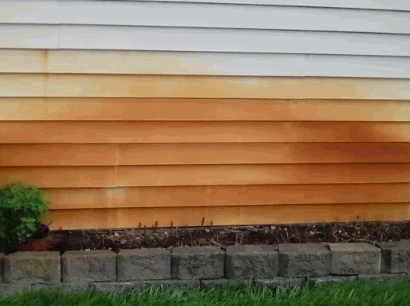
- Grass – green or brown marks from grass or soil.
- Hard Water – white or chalky marks from mineral deposits in water.
- Paint – unsightly marks from paint splatters or graffiti. May need special cleaners.
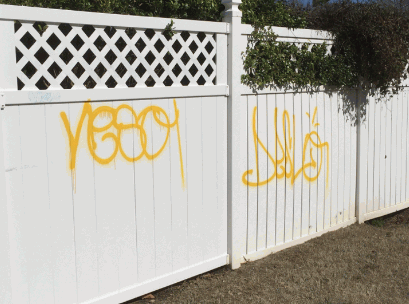
To keep vinyl fencing in good condition, address stains quickly. Clean with mild detergent and water. For tougher stains, use specialized cleaners or ask a professional.
For prevention, don’t put metal objects against the fence. Trim plants near the fence. And take precautions when painting nearby.
Preparing For Stain Removal
To successfully remove stains from vinyl fencing, proper preparation is crucial. Here are three key points to consider:
- Gather the necessary tools and materials: Before beginning the stain removal process, gather all the necessary tools and materials such as a soft-bristle brush, mild detergent, warm water, and a clean cloth. Having everything ready will ensure a smooth stain-removal process.
- Clean the fence surface: Start by cleaning the vinyl fence surface using a mild detergent and warm water. Use a soft-bristle brush to scrub away any dirt, grime, or debris. Rinse thoroughly with water afterward. This step is essential to ensure optimal stain removal results.
- Test stain removal methods: Before applying any stain removal product or technique on the entire fence, it’s advisable to test it on a small, inconspicuous area first. This will help you determine the suitability and effectiveness of the method without risking any damage to the vinyl fence.
Additionally, avoid using abrasive cleaners or harsh chemicals as they can cause damage to the vinyl fencing material and compromise its integrity.
A significant note to keep in mind is that vinyl fencing is relatively low-maintenance and highly resistant to staining. This makes it an ideal choice for outdoor use, as it can repel most stains with ease.
Vinyl fencing is recognized for its exceptional durability and stain-resistant properties, making it a popular option for homeowners and businesses alike.
Gather the essential supplies because ignoring the stain won’t make it magically disappear, unlike those embarrassing high school photos.
Gather Necessary Materials
Gather materials for stain removal with 6 steps:
- Get a cloth or sponge to blot the stain.
- Mix mild detergent into a bowl of warm water.
- Vinegar is a great solution for tough stains.
- Use a soft-bristle brush to gently scrub away stubborn marks.
- Keep a dry towel or paper towel to soak up excess moisture.
- Enzyme-based remover is handy for pesky stains.
Different stains may need special materials. For example, alcohol or hairspray for ink, dish soap, or baking soda for grease.
Pro Tip: Test a small part before applying it to a stained surface. This avoids damage to the material during removal.
Safety Precautions
Protect yourself! Put on gloves, goggles, and masks before beginning to remove a stain. Ventilation is key. Open windows or use fans to avoid any toxic fumes or vapors. Be mindful of the chemicals you use – don’t mix them unless it’s safe. Read labels carefully. And, remember to read the instructions on the stain remover product!
Safety is essential. Don’t risk it! Wear protective gear, work in a ventilated area, and understand chemical compatibility. This way, you can keep yourself safe and get the job done. Your well-being comes first – never forget that!
Step-By-Step Stain Removal Process
Vinyl fences may develop stains over time due to various factors. To effectively remove these stains, follow this professional guide.
- Identify the stained areas: Inspect the vinyl fence carefully to identify all the areas that are stained. This will help you target the cleaning process more efficiently.
- Prepare a cleaning solution: Mix a mild detergent or vinegar with warm water in a bucket. This solution will act as a gentle yet effective cleaner for the stains on the vinyl fence.
- Clean the stained areas: Dip a soft cloth or sponge into the cleaning solution and gently scrub the stained areas of the vinyl fence. Make sure to apply enough pressure to remove the stains without damaging the fence’s surface.
- Rinse and dry the fence: Rinse the fence thoroughly with clean water to remove any residue from the cleaning solution. Use a cloth or towel to dry the vinyl fence completely, ensuring that no moisture remains on the surface.
Remember, it is essential to follow these steps carefully to avoid any potential damage to the vinyl fence.
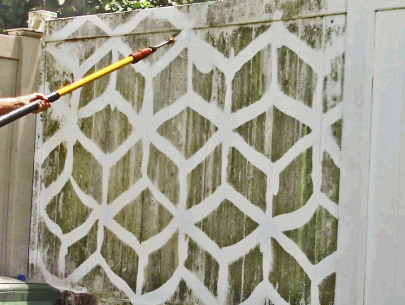
Additionally, it’s crucial to consider the cause of the stains on the vinyl fence. Common causes include mold, mildew, dirt, or even residue from plants. By understanding the source of the stains, you can take preventive measures to avoid future occurrences.
In a similar situation, a homeowner successfully removed stubborn stains from their vinyl fence using this step-by-step process. They were pleasantly surprised by the restored appearance of their fence, and it motivated them to regularly maintain its cleanliness.
By following this professional stain removal process, you can restore the beauty of your vinyl fence and keep it looking pristine for years to come.
Who needs to hire a detective when you’ve got a stain on your vinyl fencing? Cleaning the surface is like solving a mystery, except the culprit is just spilled ketchup, not a mastermind criminal.
Cleaning The Surface
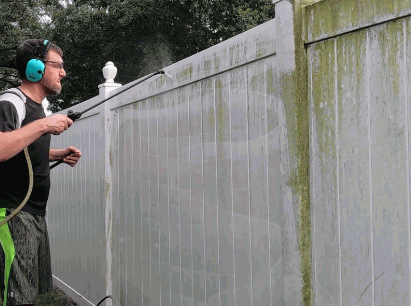
Mix mild detergent with warm water to create a cleaning solution. Soak a cloth or sponge in it, squeezing out extra liquid. Go in a circular motion, with moderate pressure, to scrub the stained area. Rinse the cloth or sponge regularly to avoid making the stain worse. Keep scrubbing until the stain is lighter or gone. Once done, rinse using clean water and dry thoroughly.
Different surfaces might need different cleaning methods or special products. Think about the material, texture, and susceptibility to damage – some surfaces may be sensitive to certain chemicals or scrubbing. Be mindful to clean safely and effectively.
Applying A Stain Remover
If you want to remove stains successfully, you must understand the art of using a stain remover. This step is key in stain removal. First, you should figure out what type of stain you have. Different stains need special stain removers, so pick the right one. Read and follow the instructions on the product label before using it. Put a bit of the remover on the stain. Don’t put too much or it may make the stain worse. Use a clean cloth or sponge and carefully rub it into the fabric. Leave it on for the amount of time mentioned on the product label. After that, rinse out the stained area with cold water. Patience is important, as it may take multiple tries to get rid of stubborn spots. Before applying any remover, try it on a hidden part of the garment if it is delicate.
Scrubbing And Rinsing
To remove a stain, start by wetting it with cold water. This stops it from setting in. Then, softly scrub with a brush or sponge in circles. Be gentle – scrubbing too hard may damage the fabric. Rinse the area with cold water, and repeat if needed until the stain is gone.
Remember: Act fast when cleaning a stain. Different stains require different solutions or methods. For advice, you could ask a professional or do some research.
Fun Fact: Vinegar can remove various stains due to its acidic properties. That’s according to Good Housekeeping!
Preventing Future Stains
To prevent stains from occurring on vinyl fencing, follow these simple steps:
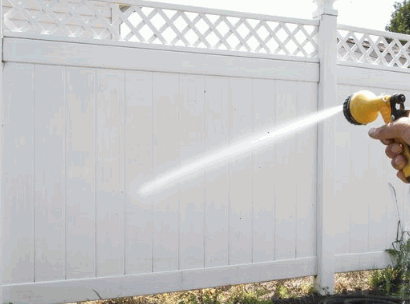
- Regularly clean the vinyl fencing with a mild detergent and water mixture.
- Avoid using harsh chemicals or abrasive cleaners that may cause discoloration.
- Apply a protective coating or sealant to the vinyl surface to prevent staining.
- Keep vegetation and plants away from the fencing to minimize contact with potential staining agents.
- Regularly inspect and repair any damages or cracks in the vinyl fencing to prevent moisture buildup and potential stains.
To ensure maximum effectiveness in preventing future stains on vinyl fencing, it is also important to consider the following details:
Vinyl fencing is susceptible to staining from various sources, including rust, mold, mildew, and even certain types of vegetation. By implementing these preventive measures, you can maintain the appearance and integrity of your vinyl fencing for years to come.
True Fact: According to the Vinyl Fence Materials Association, vinyl fencing is a durable and low-maintenance option that can resist staining when properly cared for.
The only way to keep your vinyl fence looking fabulous is to give it some regular TLC, because let’s face it, a stained fence would really ruin your property’s street cred.
Discover: How To Install A Garden Fence
Regular Maintenance Tips
Cover or case up! Shield your belongings from dust, dirt, and spills with protective covers or cases. Keep ’em clean! Regularly use the right products and techniques to clean without damage.
Sunlight can be bad! Direct sunlight can fade and discolor items – so keep ’em away from windows, or use curtains or blinds.
Handle with care! Take care when moving or storing, it to keep it in its original condition.
Prevention > cure! Maintenance and following tips will help reduce the chances of stains.
True history! Antique furniture faded due to sunlight, rugs stained from spills – these stories teach us the importance of regular maintenance to prevent future staining.
Protective Coatings Or Sealants
Table:
| Coating/Sealant Type | Purpose | Examples |
|---|---|---|
| Ceramic Coatings | Durable & glossy finish. Protects against scratches, UV rays & chemical contaminants. | Gtechniq Crystal Serum Ultra, CarPro Cquartz UK Edition |
| Paint Protection Films | Shields paintwork from rock chips, scratches & environmental elements. | XPEL Ultimate Plus, 3M Scotchgard Pro Series |
| Fabric Sealants | Repels liquid spills & stains on upholstery/fabric surfaces. Makes cleaning & maintenance easy. | Scotchgard Fabric & Upholstery Protector, Nanolex Textile & Leather Shield |
| Concrete Sealers | Prevents moisture intrusion & protects from staining due to oil spills/other substances. | Foundation Armor AR350 Wet Look Sealer, Armor SX5000 Penetrating Silane Siloxane Sealer |
Unique features found in some ceramic coatings: self-healing properties. Can repair light scratches with heat application.
WWII: Protective coatings were used to protect military vehicles from corrosion due to harsh weather/chemicals. This breakthrough led to further advancements in protective solutions.
Conclusion
Tackle those pesky stains on your vinyl fence now! These tips and techniques can help you restore its pristine appearance and make it last for years.
To start, warm water and mild dish soap mix can clean surface stains easily. Gently scrub the stain with a soft-bristle brush in circular motions.
For tougher stains like rust or mold, use a vinegar and water mix. Apply the mixture directly and let it sit for a few minutes before scrubbing and rinsing.
If persistent stains remain, get commercial vinyl cleaning products. Follow the instructions for the best results.
Regular maintenance and prompt attention to any signs of dirt or discoloration will prevent future stains. So don’t wait – get the stunning fence you deserve and add value to your home!
 My name is Stacey Reid the senior author at Art Syndicate. I enjoy everything homely and everyday I am amazed at the creativity that I find on the internet to write about and the items that I find to sell to our visitors. I cannot however find everything out there as it is very time consuming so please come and take the time to tell us about something new if you think our visitors would like it.