Garden fences can be a great bonus to any outdoor space! They offer security, privacy, and a nice look. Installing one may seem daunting, but with the right knowledge and tools, it’s simple.
Step 1: First, decide why you want to install the fence. Are you trying to keep kids or pets in? Or do you just want a property boundary? Knowing your goal helps pick the right materials and design.
Step 2: Then, pick the type of fence. Options include wooden, vinyl, metal, and chain-link fences. Each has advantages and needs, like durability, maintenance, and cost. Take local weather into account to find a long-lasting fence.
Step 3: Measure your garden accurately. This tells you how much material is needed and helps the fence stay straight. Mark out the boundary with stakes and strings.
Step 4: Now it’s time to install. Follow safety steps and use the right tools. If you need help, ask friends or family with experience. Dig post holes at regular intervals with a post-hole digger. Make sure they’re deep and spaced evenly.
Step 5: Insert posts, using temporary supports if needed. Attach rails across posts, using nails or screws. Add extra rails midway up for extra support. Trim off excess and secure panel caps to the tops of posts. This prevents water damage and injury from sharp edges.
Delve into: How To Install Glass Pool Fencing
Choosing The Right Fence
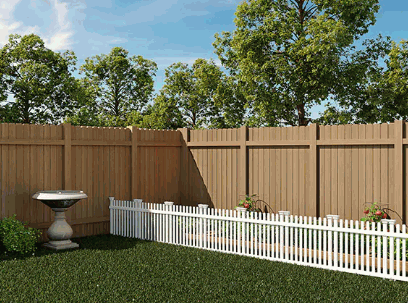
Contemplate the aesthetics of your garden fence! Look for colors that will blend in with your house and environment. Choose between wood, vinyl, metal, or composite materials based on their durability, upkeep, and price. Decide if you need a fence for privacy, security, or decoration. Different designs will meet different needs.
Remember to take into account the maintenance of your fence. Some materials may require frequent painting or treatment to stay looking great!
Pro Tip: Get help from professionals or garden design specialists to make sure you pick the perfect fence for your garden.
Tools And Materials Needed
Spice up your outdoor space by installing a garden fence! To ensure a successful and efficient process, you’ll need the following essentials:
- fence panels
- posts
- fasteners
Post caps, garden gates, and gravel or concrete can also add to the beauty of your fence. Before you start, make sure to measure and plan your desired fence size. Also, remember to check with local authorities for any permits or regulations you may need. Get your project rolling today to bring extra security and elegance to your space!
Preparing The Ground
To successfully prepare the ground for installing a garden fence, ensure a smooth process by following these steps: Clearing the Area, Measuring, and Marking the Fence Line. By properly clearing the area and accurately measuring and marking the fence line, you’ll set the foundation for a seamless fence installation.
Clearing The Area
Clearing an area? Here’s the 5-step guide!
- Assess the space. Check for any hazards or obstacles needing attention.
- Remove debris and unwanted items. Get rid of any branches or equipment.
- Trim vegetation. Cut back overgrown plants. Beware of thorns or poison.
- Dispose of waste correctly. Follow protocols and regulations to maintain environmental sustainability. Keep health risks away.
- Secure the site. Put up temporary fences or barricades.
These steps will help you create a solid foundation for your project! Safety should always be your priority.
Pro Tip: For large-scale projects or hazardous materials (e.g. asbestos), consider professionals. They have the right expertise & equipment to do it safely & efficiently.
Measuring And Marking The Fence Line
Measuring & marking the fence line is essential to a successful fencing project. It ensures accuracy & a neat look. Here’s how to do it!
- Step 1: Look at the area. Walk around & note any obstacles like trees or uneven ground.
- Step 2: Measure the perimeter. Use a tape or wheel to measure from corner to corner. Write down your measurements.
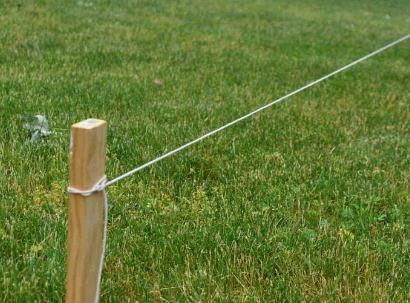
- Step 3: Mark the corners. Put stakes or spray paint at each corner to give a starting point. Double-check before marking.
- Step 4: Place markers. Put stakes or flags in between to get equal spaces between posts. This is an important step that requires precision. Measure & mark accurately to avoid any trouble during installation. Doing this will result in a sturdy & beautiful fence that will last! Start now & create a strong foundation for your fencing project.
Installing Fence Posts
Digging Post Holes
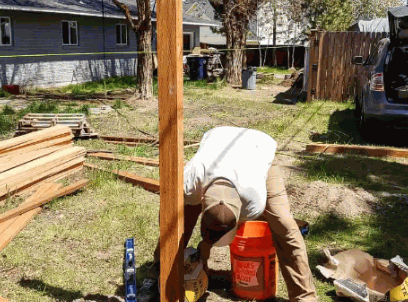
Safety should always be a top priority when digging post holes. Before starting, use a utility line locator to prevent any possible damage.
Now you can start installing your fence! Measure the distance between each post, making sure they are evenly spaced.
Using a post-hole digger, start digging a hole that is at least one-third of the height of the post. Take out any rocks or debris from the hole to avoid future damage. Make sure it is wide enough for concrete or gravel around the post for extra stability.
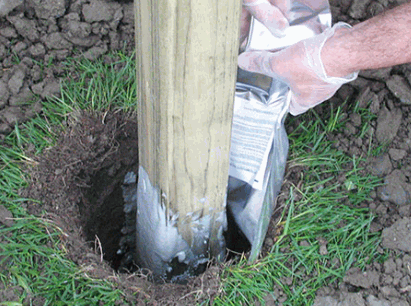
Place the fence post in the hole, making sure it is completely level and standing upright. Fill the hole with either concrete or gravel, packing it firmly around the post.
Don’t miss out on all the benefits of a fence – increased privacy, improved aesthetics, and higher property value. Start digging post holes and enjoy your new outdoor space!
Inserting And Securing Fence Posts
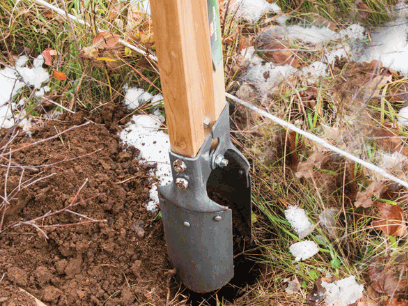
Inserting and securing fence posts is super important for a sturdy, long-lasting fence. Follow these steps to get it done right!
- Prep the site: Clear away debris and vegetation. Make sure the ground is level.
- Dig the holes: Use a post-hole digger or an auger. Make sure the holes are deep and wide enough.
- Put ’em in Carefully place each post into its hole. Use a level to check they’re vertical.
- Secure ’em: Backfill each hole with concrete or compacted soil. Cure them before attaching panels or rails.
Pressure-treated wood is great for protecting against rot and bugs.
This is a reminder that DIY projects can be empowering but you gotta know when to call the experts. Make sure your fence posts are properly secure and you’ll have a fence that lasts!
Attaching Fence Panels
To achieve a secure and properly aligned garden fence, follow these simple steps. Secure fence panels to posts and ensure they are firmly in place. Additionally, make sure to check for proper alignment to maintain a visually pleasing and structurally sound fence.
Securing Fence Panels To Posts
Secure fence panels to posts with these 4 steps:
- Align panel: Ensure the gap between each panel is consistent.
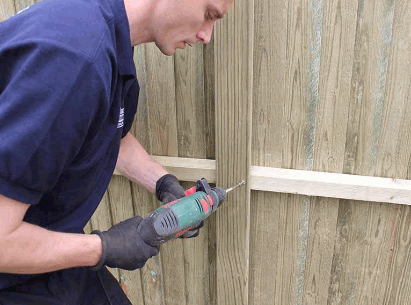
- Attach brackets: Use galvanized screws or nails to fasten brackets to both sides of the panel near the top and bottom.
- Mount panel: Lift carefully and fit snugly without wobbling or gaps.
- Secure with fasteners: Use screws or nails to secure firmly to each post through brackets.
For added durability, treat fence panels with weather-resistant coatings or paint. Regular maintenance is essential too. Inspect periodically for issues and repair any found promptly.
Checking For Proper Alignment
To make sure the fence panels are properly aligned, do these steps. First, use a level to see if the panels are flat along the top and bottom. Also, measure the vertical alignment with a tape measure/ruler to make sure each panel is the same distance from the ground.
| Criteria | Data |
|---|---|
| Horizontal alignment | Straight |
| Vertical alignment | Evenly spaced |
Remember other important details not mentioned yet. Check if the panels are placed uniformly and adjust if needed. Make sure the connectors are secure and firmly fastened to avoid misalignment in the future.
Act now to steer clear of future issues. Guarantee proper alignment during installation to avoid readjustments or maintenance problems down the line.
Adding Finishing Touches
To add those finishing touches to your garden fence installation and make it truly complete, turn your attention to installing gates and applying paint or stain. These sub-sections will provide you with the solutions needed to put the final touches on your garden fence project, ensuring it blends seamlessly into your outdoor space and adds both functionality and aesthetic appeal.
Installing Gates
Installing gates can be complex, so here are 3 steps to help make it a success:
| 1. Spot the Right Place: | Pick an ideal location for your gate. Keep things like security, privacy, & accessibility in mind. Measure accurately to make sure it fits. |
| 2. Ready the Ground: | Clear any obstacles or debris from the installation site. Level the ground, if needed, to give your gate a stable base. This is important to keep it working and lasting. |
| 3. Install the Gate Properly: | Follow the manufacturer’s instructions. Make sure all parts are secure & aligned correctly. Check that it opens and closes smoothly before finishing. Customize with locks, hinges, & decorative elements according to your preferences. |
Tip: Maintenance is key for your gate’s longevity. Look for damages or loose parts regularly & address any issues quickly.
Applying Paint Or Stain
Make your project unique with a splash of color or show off its natural beauty with paint or stain. Here’s a step-by-step guide to help you get professional results that’ll last.
- Prep: Clean the surface, then sand any rough areas and repair cracks or holes.
- Pick the product: Consider factors like durability, color options, and compatibility with the material you’re working on.
- Test it: Try it in a small spot before you apply it everywhere. This helps you get the desired color and finish.
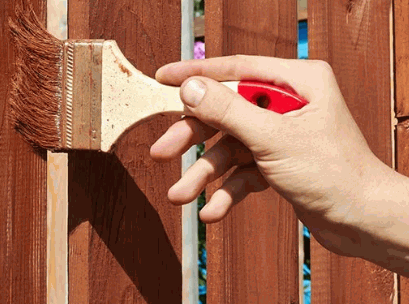
- Apply: Use a brush, roller, or sprayer. Follow instructions and take your time, working in small sections.
- Finishing touches: Look over your work for any imperfections and touch up missed spots or uneven areas.
Different projects may require special techniques and considerations when applying paint or stain. Check out DIY guides or seek professional advice for unique challenges.
Maintenance And Care
To ensure the longevity and effectiveness of your garden fence in ‘Maintenance and Care,’ address the sub-sections: ‘Regular Inspection and Cleaning’ for preventing and maintaining the fence’s integrity, and ‘Repairing Damaged Sections’ to promptly address any issues that arise. By following these solutions, you can keep your garden fence in optimal condition for years to come.
Regular Inspection And Cleaning
Regular inspections and cleanings are key to preserving the longevity and performance of any item or system. Forgetting this can cause damage or jams, leading to costly repairs or replacements. Here’s a 3-step guide for inspections and cleaning:
| 1. Visual Check: | Look for signs of wear and tear, dirt, and debris. Check for loose parts, cracks, leaks, and strange noises. This aids in recognizing any issues that need attention. |
| 2. Cleaning: | After the visual check, use suitable cleaning agents and tools to remove dirt, dust, and grime from all surfaces. Focus on hard-to-reach spots, where debris may accumulate. |
| 3. Testing: | Once the cleaning is done, test the functionality of the item or system. If applicable, adhere to the manufacturer’s guidelines for testing certain components. |
Now, here are some other details to consider for a comprehensive inspection and cleaning routine:
- Lubrication: Some items may require lubrication to avoid friction-related damage and ensure smooth operation. Read the manufacturer’s instructions about the right lubricants and when to use them.
Additionally, the following tips can help make your inspection and cleaning routine more effective:
- Set a Schedule: Make a regular schedule for inspections and cleanings based on how often you use the item or system and the manufacturer’s recommendations.
- Keep Records: Jot down the findings from each inspection session, including dates, observations, and actions taken. This will help monitor wear patterns and spot recurring issues.
By using these tips, you can keep your items or systems in perfect condition:
- Avoid Problems: Regular inspections allow you to identify potential problems early and fix them before they become severe.
- Improved Performance: Cleaning removes unwanted particles, enabling optimal performance and greater durability.
Repairing Damaged Sections
When it comes to repairing damaged sections, there are a few must-dos. To restore efficiently, you should:
| 1. Identify the extent of the damage. Examine the affected area carefully to determine its severity. Look for cracks, breaks, or other signs of deterioration. This will help you figure out the required materials and tools. |
| 2. Prepare the damaged section. Before starting repairs, remove any loose or broken pieces, clean the area, and make sure it is dry. |
| 3. Repair and restore. Use suitable techniques such as patching, sealing, or replacing materials to fix the problem. |
Remember, timely repairs can prevent further damage and keep the structure’s integrity intact. Wear safety gear such as gloves and goggles when working.
Regular maintenance can help detect potential issues in advance. Addressing small damages promptly can save time and money in future extensive repairs.
Conclusion
To wrap it up, adding a garden fence can beautify and add privacy to your backyard. By following the steps in this article, you can build a secure wall for your garden.
- Choose the right material that fits your needs and suits your garden’s style. Wood, metal, or PVC, each has its advantages and downsides.
- Also, measure the area you want to install the fence accurately. This will help you get the right amount of materials and avoid any additional costs or delays.
- Don’t forget to secure the posts. Dig deep holes and pour concrete or gravel to make sure they don’t lean over time.
- Do not forget about the gate installation. Follow the manufacturer’s instructions for proper gate installation to make sure it works and is safe.
Remember: before starting the fence project, check with local authorities to find out if you need a permit or are subject to any regulations.
 My name is Stacey Reid the senior author at Art Syndicate. I enjoy everything homely and everyday I am amazed at the creativity that I find on the internet to write about and the items that I find to sell to our visitors. I cannot however find everything out there as it is very time consuming so please come and take the time to tell us about something new if you think our visitors would like it.